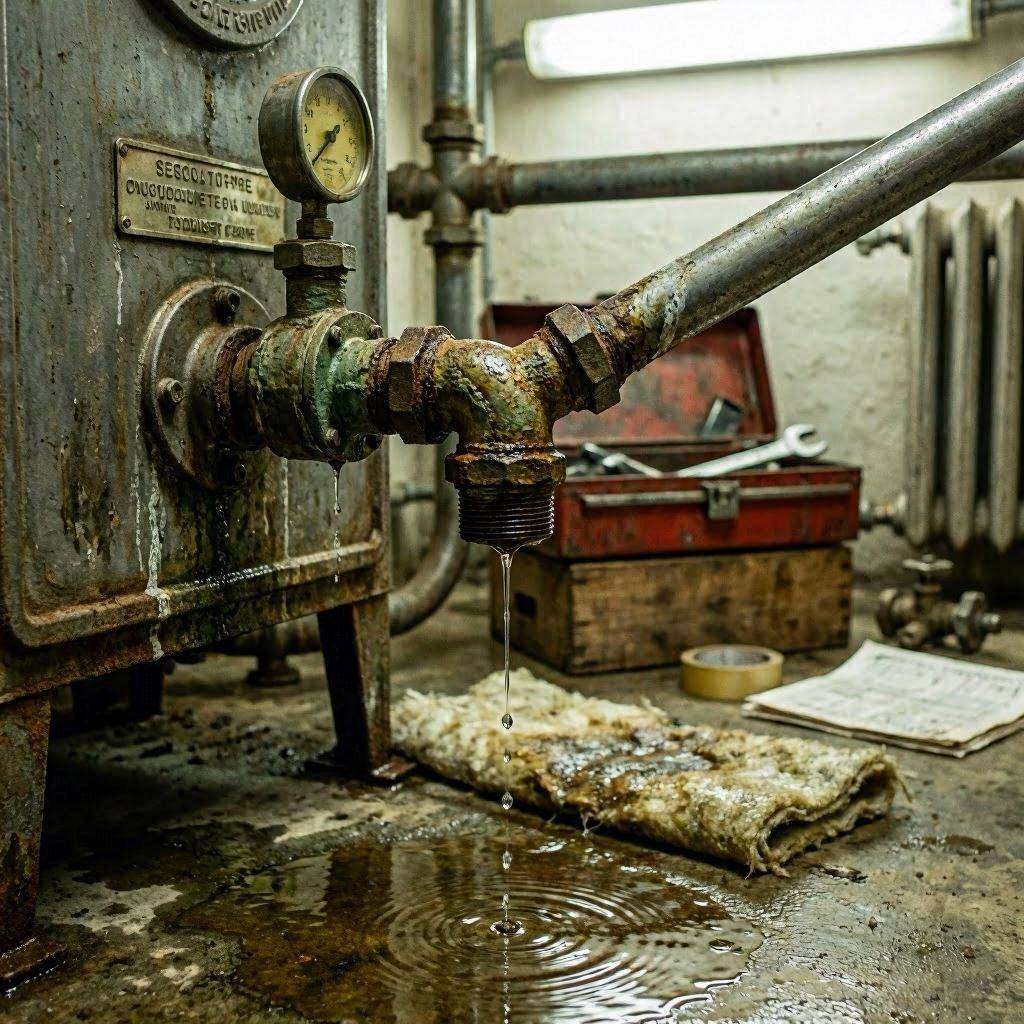
There is a specific kind of psychological torture that begins with a faint, rhythmic sound coming from your utility closet or basement. Drip. Drip. Drip.
At first, you ignore it, convincing yourself it’s just the pipes cooling down after the heating shuts off. But eventually, you grab a flashlight, open the access door, and peer underneath the unit. Sure enough, there is a small, stubborn pool of water forming on the floor directly beneath the copper pipework.
A dripping boiler leak is never something you can afford to relegate to your “fix it next weekend” list. In the heating trade, water inside a gas appliance is viewed with the same urgency as a structural crack in a foundation. A boiler is a dense package of complex electronics, high-voltage wiring, and gas combustion components sitting directly beneath pressurized water lines. When water starts escaping its designated pathways, it doesn’t just threaten your floorboards—it threatens the very life of the appliance.
If you are currently watching water slowly escape your system, let’s pull back the casing, trace exactly where that moisture is coming from, and look at the real-world engineering required for repairing a boiler before a minor leak escalates into a catastrophic system blowout.
The Leak Blueprint: Where is the Moisture Escaping?
A boiler doesn’t just leak from one generic place. Because it handles vast shifts in pressure and temperature, water can find multiple exit points. Pinpointing the exact geographic location of the drip is 90% of the diagnostic battle.
                  [THE WATER DROPLET TRAIL]
                              │
         ┌────────────────────┼────────────────────┐
         ▼                    ▼                    ▼
   [The Bottom Pipes]   [The Safety Valve]   [The Internal Pump]
   Corroded Joints /    High Pressure /      Worn Hydraulic Seals /
   Blown Compression    Failed Expansion     Cracked Component
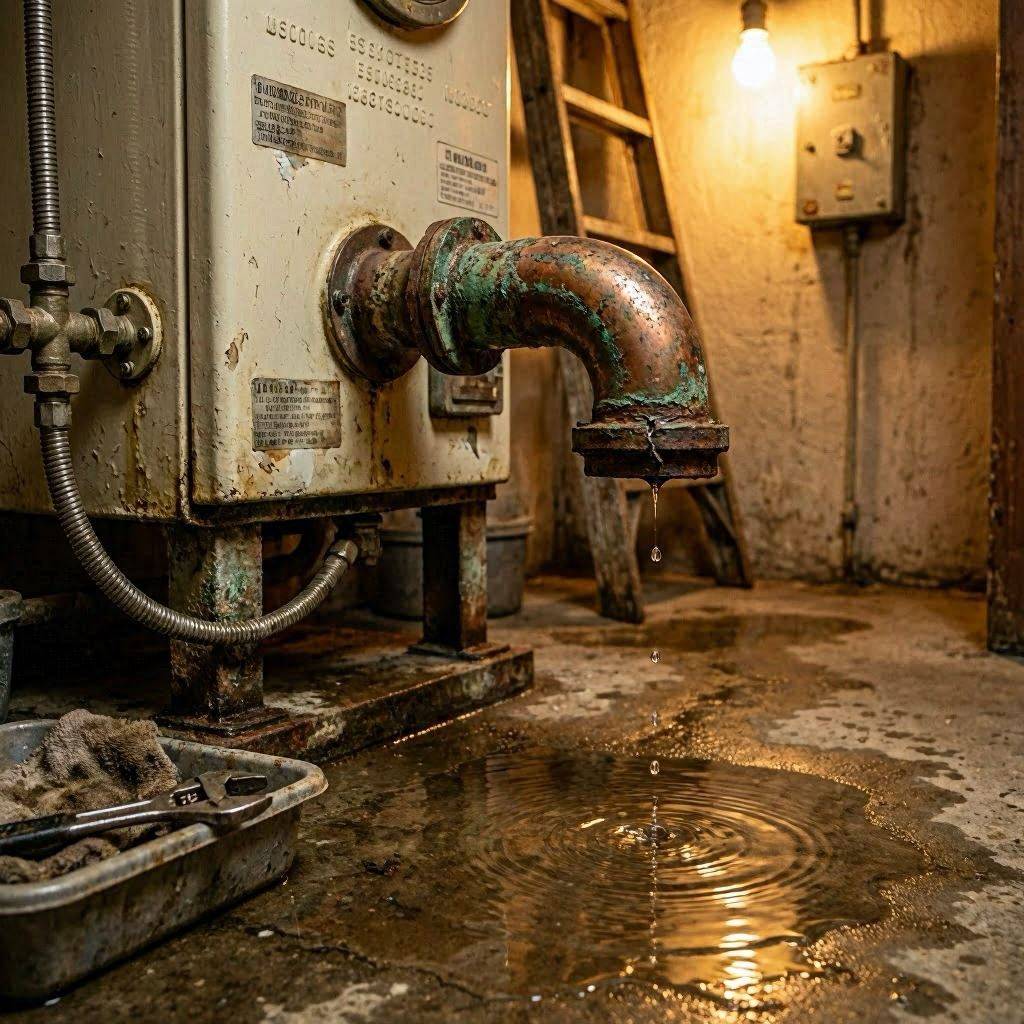
1. Dripping from the Copper Pipe Joints (The Foundation Leak)
If the water is weeping strictly from the brass compression fittings or copper solder joints directly underneath the boiler casing, you are usually dealing with thermal stress. Over years of operation, these pipes rapidly cycle between cold water and 75°C boiling water. This constant expansion and contraction puts immense strain on the joints. Eventually, an O-ring degrades or a joint loosens, allowing a slow, steady weep to form.
2. Spitting from the Pressure Relief Valve (The Safety Vent)
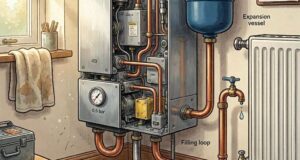
If you look outside your house and notice a small copper pipe sticking through your exterior brickwork is constantly dripping or spraying water, your issue isn’t a loose joint. This is the Pressure Relief Valve (PRV). It is designed to open up and vent water when the internal system pressure crosses a dangerous threshold (usually 3.0 bar). If your system pressure spikes because your expansion vessel has failed, this valve does its job by dumping water to prevent your heat exchanger from cracking.
3. Pooling Inside the Casing (The Internal Component Failure)
This is the most dangerous scenario. If you remove the outer decorative panel and see water tracking down the internal metal chassis, the leak is originating from a core component. It could be a failing automatic air vent, a corroded main heat exchanger, or a weeping seal on the internal circulation pump.
The True Danger of a Slow Boiler Drip
Many homeowners place a plastic Tupperware container under the drip, empty it once a week, and assume they have managed the situation. This is a massive financial gamble.
| The Delayed Action | The Costly Consequence |
|---|---|
| Electronic Destruction | Water tracking down internal metal sheets almost always finds its way onto the Printed Circuit Board (PCB). Short-circuiting the boiler’s brain turns a cheap fix into a massive replacement bill. |
| Systemic Rust & Corrosion | Constant fresh water dripping over mild steel brackets and casing panels causes structural rust, making future component replacements physically impossible. |
| Continuous Pressure Loss | Even a microscopic leak drops your system pressure over time, plunging your boiler into a protective safety lockout in the middle of a freezing night. |
The Tactical Guide to Repairing a Boiler That is Leaking
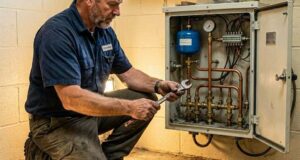
When it comes to repairing a boiler with a water leak, the line between an amateur DIY attempt and professional intervention is very sharp. Safety and licensing laws dictate exactly how far you can go.
Step 1: The Isolation Protocol (Immediate Action)
The moment you confirm an active leak, you must protect the system from itself:
- Kill the Power: Switch off the electrical spur switch next to the boiler. Water and live electronics are a lethal combination.
- Turn Off the Water Supply: Locate the main cold water isolation valve underneath the boiler casing and turn it off to prevent new water from feeding the leak.
- Dry the Area: Use towels to mop up any standing water near the bottom of the casing to protect your cabinetry or flooring.
Step 2: The Pressure Gauge Test
Look at your control panel. Is the needle sitting in the healthy green zone (1.0 to 1.5 bar), or is it pinned all the way into the red zone near 3.0 bar?
- If it’s over 2.5 bar: Your leak is likely a symptom of an overfilled system or a failed expansion vessel. You can resolve this temporarily by bleeding your radiators to dump water pressure back down to 1.2 bar.
- If the pressure is normal or low but it still drips: You have a physical breach in a seal, pipe, or component that requires mechanical replacement.
When Does a Leak Require a Certified Engineer?
While tightening a loose external copper compression nut with an adjustable wrench is perfectly acceptable for a handy homeowner, opening the inner combustion seal of a gas boiler is strictly illegal for anyone without a Gas Safe or equivalent professional license.
If the water is dripping from inside the combustion chamber, around the gas valve assembly, or out of the internal pump housing, you must call a certified professional.
[DIY Friendly] ──► Bleeding Radiators / Tightening External Plumbing Connections
[Licensed Only] ──► Changing Internal Pump Seals / Replacing Heat Exchangers / Swapping PCBs
A licensed technician doesn’t just swap the broken part. They use specialized digital pressure rigs to verify the system’s hydraulic integrity, check the gas-to-air burn ratios, and perform essential flue gas analysis to ensure your appliance isn’t releasing deadly, odorless carbon monoxide into your home after the mechanical work is complete.
Long-Term Prevention: Keeping the System Dry
Water leaks are rarely a surprise; they are the final stage of a system that has been under internal stress for years. To prevent finding yourself in this stressful situation again:
- Install a Magnetic Sludge Filter: This traps the black iron oxide debris that grinds away at your internal pump seals, preventing pump leaks before they can even start.
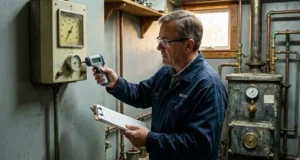
- Get an Annual Service: A technician will check the internal expansion vessel pressure and spot minor “weeping” seals during a routine inspection, swapping them out before they turn into full-blown leaks that ruin your flooring.
Treat the Drip as an Ultimatum
A dripping boiler leak is your heating system’s way of issuing a warning. It is a minor inconvenience today that will transform into an expensive mechanical disaster tomorrow if ignored.
Don’t live with the plastic bucket under the casing. Identify the source of the water, manage the system pressure, and bring in a professional engineer when the repair crosses behind the safety panel. Keeping your components dry and your connections tight ensures your system operates with maximum efficiency and total safety through every cold stretch of the year.